How to create custom overlay component in react-leaflet using leaflet-velocity

Full Stack developer from Pune. Crazy about React-js and the whole React ecosystem.
I was recently working on a project that used react-leaflet to display a map on the web page and I was using the LayersControl API to display different layers on the map conditionally.
If you have used react-leaflet before for your projects then you are familiar with one of the challenges that is creating a custom overlay component.
Here's where react-leaflet's core api comes into play.
The goal of this package is to make most of react-leaflet's internal logic available to developers to easily implement custom behaviors, such as third-party Leaflet plugins and in our case custom overlay components.
We will be making use of leaflet-velocity package which is used to display velocity data on leaflet layer. In our case we will be displaying global wind data using some demo JSON data
STEP 1: Installation
You can install react-leaflet's core API using the command npm i @react-leaflet/core
STEP 2: Creating a custom overlay component
WindyLayer.jsx
import "leaflet-velocity";
import L from "leaflet";
import React from "react";
import { useLeafletContext } from "@react-leaflet/core";

const WindyLayer = ({displayValues, displayOptions, data, minVelocity,
 maxVlocity, opacity,
}) => {
  const context = useLeafletContext();

  React.useEffect(() => {
    const velocityLayer = L.velocityLayer({
      displayValues: displayValues,
      displayOptions: displayOptions,
      data: data,
      minVelocity: minVelocity,
      maxVelocity: maxVlocity,
      opacity: opacity,
    });
    const container = context.layerContainer || context.map;

    container.addLayer(velocityLayer);

    return () => {
      container.removeLayer(velocityLayer);
    };
  });

  return null;
};

export default WindyLayer;
Firstly we will import useLeafletContext hook from the @react-leaflet/core package which will return the LeafletContext created by the MapContainer component in the parent file.
const velocityLayer = L.velocityLayer({
      displayValues: displayValues,
      displayOptions: displayOptions,
      data: data,
      minVelocity: minVelocity,
      maxVelocity: maxVlocity,
      opacity: opacity,
    });
We will then create the velocity layer in our custom component's useEffect using leaflet-velocity package and pass the required options using our destructured props.
The data passed in the options is our demo wind-global.json data that you can find by visiting leaflet-velocity's Github repo
const container = context.layerContainer || context.map;
container.addLayer(velocityLayer);
The next step is to extract the layerContainer or the map from the context and add our velocity layer to the map.
return () => {
      container.removeLayer(velocityLayer);
    };
The last step is to write a cleanup function which will remove the layer from our parent container.
Notice how we return null at the end of our component. Usually React expects us to return a valid React node but since leaflet will render this component itself react doesn't need to return anything and hence we return null.
STEP 3: Adding our custom component to the parent Map component
Map.jsx
import React from "react";
import { MapContainer,LayersControl,TileLayer } from "react-leaflet";
import "leaflet/dist/leaflet.css";
import WindyLayer from "./VelocityLayer";
import jsonData from "../constants/wind-global.json";
const center = [18.5204, 73.8567];
const Map= () => {
return (
<MapContainer
className="map-container"
center={center}
zoom={13}
scrollWheelZoom={false}
style={{
height: "92vh",
}}
>
<LayersControl position="topright">
<LayersControl.BaseLayer checked name="OSM">
<TileLayer
attribution="© OpenStreetMap contributors"
url="https://api.mapbox.com/styles/v1/mapbox/streets-v11/tiles/256/{z}/{x}/{y}?access_token=pk.eyJ1IjoicHJpeWFua2ExMjEwOTIiLCJhIjoiY2trbWQxY3h1MnBwMDJvbW5iNW96eTlrcCJ9.scUQlt1OTvRBxmshXeldaQ"
/>
</LayersControl.BaseLayer>
<LayersControl.BaseLayer name="Google map">
<TileLayer
attribution='© <a href="http://osm.org/copyright">OpenStreetMap</a> contributors'
url="http://mt0.google.com/vt/lyrs=y&hl=en&x={x}&y={y}&z={z}&s=Ga"
/>
</LayersControl.BaseLayer>
<LayersControl.Overlay name="Windy Layer">
<WindyLayer
displayValues={true}
displayOptions={{
velocityType: "GBR Wind",
displayPosition: "bottomright",
displayEmptyString: "No wind data",
}}
data={jsonData}
maxVlocity={10}
minVelocity={0}
opacity={1}
/>
</LayersControl.Overlay>
</LayersControl>
</MapContainer>
);
};
export default Map;
Now lets import our custom WindyLayer.jsx file into our parent Map.jsx file Where we have the MapContainer and add the component inside the LayersControl.Overlay .
The last step is to pass the required props to WindyLayer.jsx component
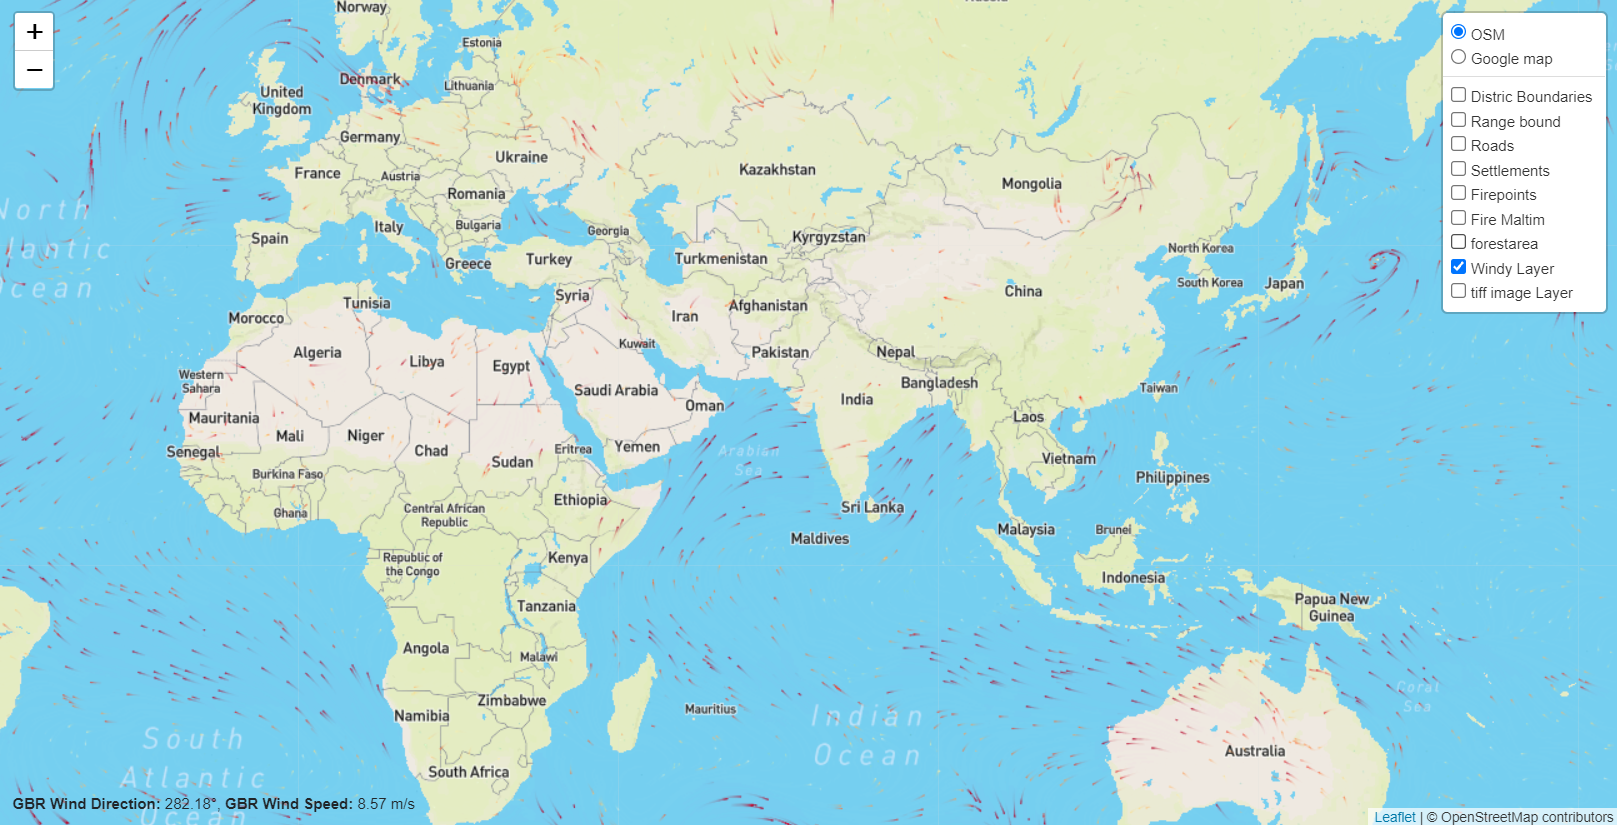
And Voila!!, we have our custom global wind layer inside our react-leaflet project.
We can create many such custom overlays using react-leaftlet's core API in the similar manner
This is my first blog so feel free to give some constructive tips and Thankyou for reading. 🙏
